 Deno 中文文档
如何在 Deno 中使用 Redis
Redis 是一种可以用于缓存、作为消息代理或数据流的内存数据存储。
在这里,我们将设置 Redis 以缓存来自 API 调用的数据,以加快对该数据的任何后续请求。我们将要做的是:
- 设置 Redis 客户端,将每个 API 调用的数据保存在内存中。
- 设置一个 Deno 服务器,以便我们可以轻松地请求某些数据。
- 在服务器处理程序中调用 Github API,以便在第一次请求时获取数据。
- 在每次后续请求时从 Redis 中提供数据。
我们可以在单个文件 main.ts 中完成这些操作。
连接到 Redis 客户端
我们需要两个模块。第一个是 Deno 服务器。我们将使用它来获取用户信息以查询我们的
API。第二个是 Redis。我们可以使用 npm: 修饰符来获取 Redis 的 node 包:
import { Server } from "https://deno.land/std@$STD_VERSION/http/server.ts";
import { createClient } from "npm:redis@^4.5";
我们使用 createClient 创建一个 Redis 客户端,并连接到我们的本地 Redis 服务器:
// make a connection to the local instance of redis
const client = createClient({
  url: "redis://localhost:6379",
});

await client.connect();
此 配置对象 还可以分别设置主机、用户、密码和端口。
设置服务器
我们的服务器将充当 Github API 的包装器。客户端可以在 URL
路径名中调用我们的服务器,例如 http://localhost:3000/{username}。
将路径名解析并调用 Github API 将发生在我们服务器的处理程序中。我们去掉了前导斜杆,因此我们剩下一个可以作为用户名传递给 Github API 的变量。然后,我们将响应传递回用户。
const server = new Server({
  handler: async (req) => {
    const { pathname } = new URL(req.url);
    // strip the leading slash
    const username = pathname.substring(1);
    const resp = await fetch(`https://api.github.com/users/${username}`);
    const user = await resp.json();
    return new Response(JSON.stringify(user), {
        headers: {
          "content-type": "application/json",
        },
      });
    }
  },

  port: 3000,
});

server.listenAndServe();
我们将使用以下命令运行此操作:
deno run --allow-net main.ts
如果我们在 Postman 中转到 http://localhost:3000/ry ,我们将收到 Github 响应:

让我们使用 Redis 缓存该响应。
检查缓存
一旦我们从 Github API 中获取到响应,我们就可以使用client.set将其在 Redis
中进行缓存,其中我们的用户名为键,用户对象为值:
await client.set(username, JSON.stringify(user));
下次请求相同的用户名时,我们可以使用 client.get 获取缓存的用户:
const cached_user = await client.get(username);
如果键不存在,则返回 null。因此,我们可以在一些流程控制中使用它。当我们获取用户名时,我们将首先检查是否已在缓存中拥有该用户。如果是,我们会提供缓存的结果。如果不是,则调用 Github API 获取用户、缓存它,然后提供 API 结果。在这两种情况下,我们都将添加一个自定义标题以显示我们正在服务的版本:
const server = new Server({
  handler: async (req) => {
    const { pathname } = new URL(req.url);
    // strip the leading slash
    const username = pathname.substring(1);
    const cached_user = await client.get(username);
    if (cached_user) {
      return new Response(cached_user, {
        headers: {
          "content-type": "application/json",
          "is-cached": "true",
        },
      });
    } else {
      const resp = await fetch(`https://api.github.com/users/${username}`);
      const user = await resp.json();
      await client.set(username, JSON.stringify(user));
      return new Response(JSON.stringify(user), {
        headers: {
          "content-type": "application/json",
          "is-cached": "false",
        },
      });
    }
  },

  port: 3000,
});

server.listenAndServe();
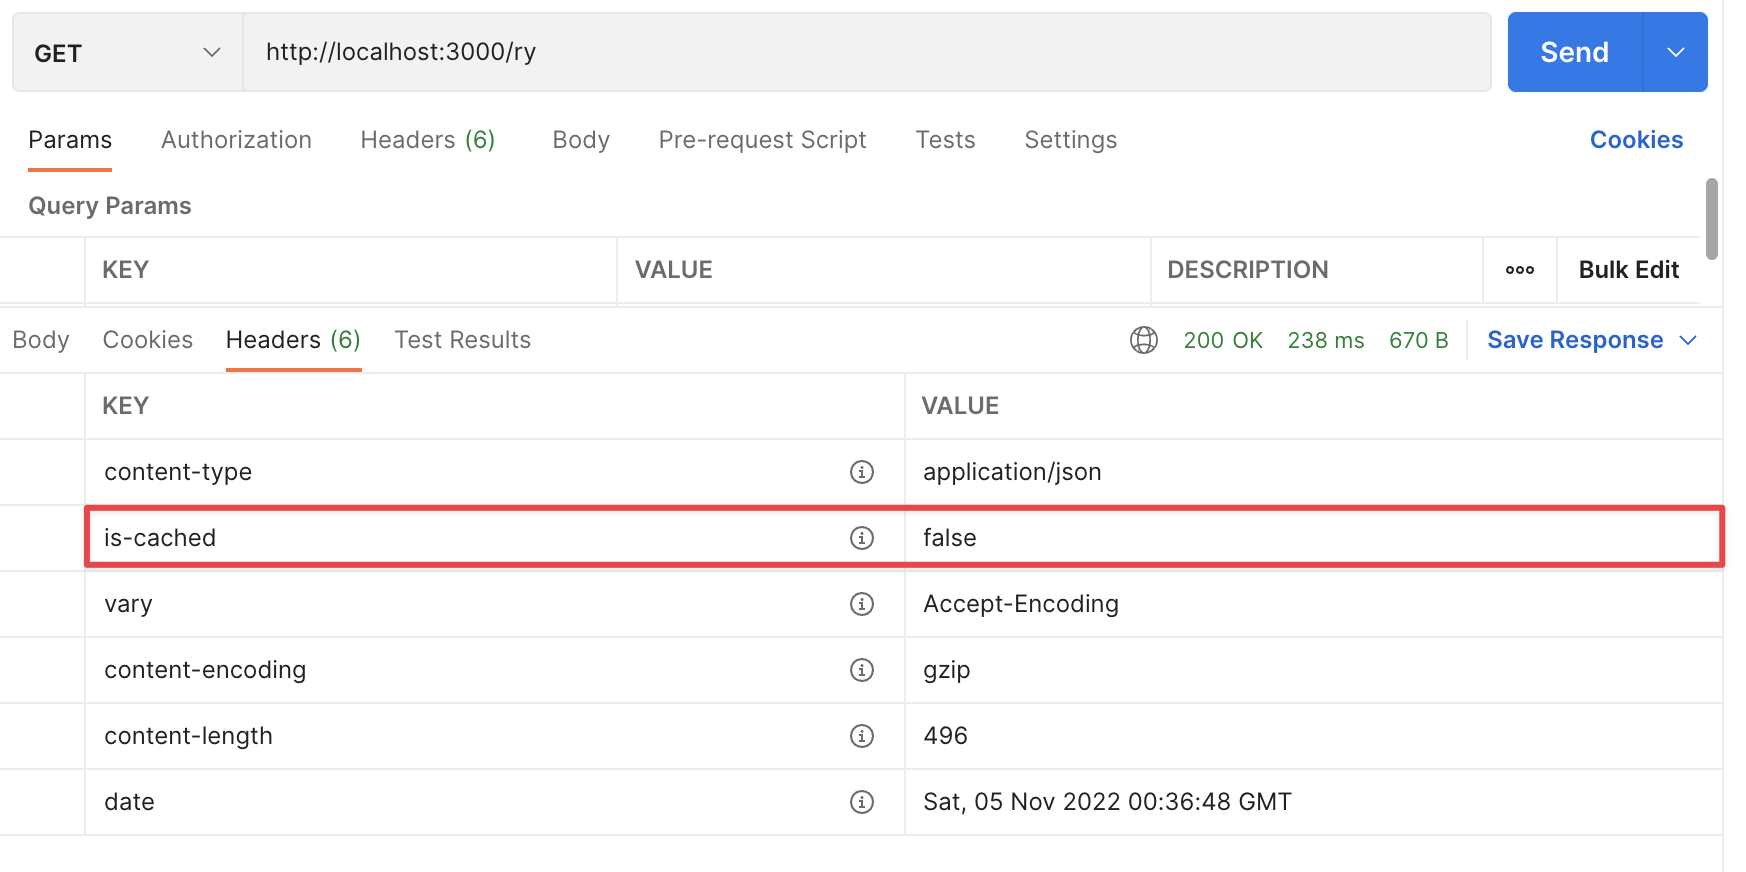
第一次运行时,我们将得到与上面相同的响应,并且我们将看到 is-cached 标题设置为
false:
但是再次使用相同的用户名进行呼叫,我们将获得缓存的结果。主体是相同的:

但是标题显示我们拥有缓存:
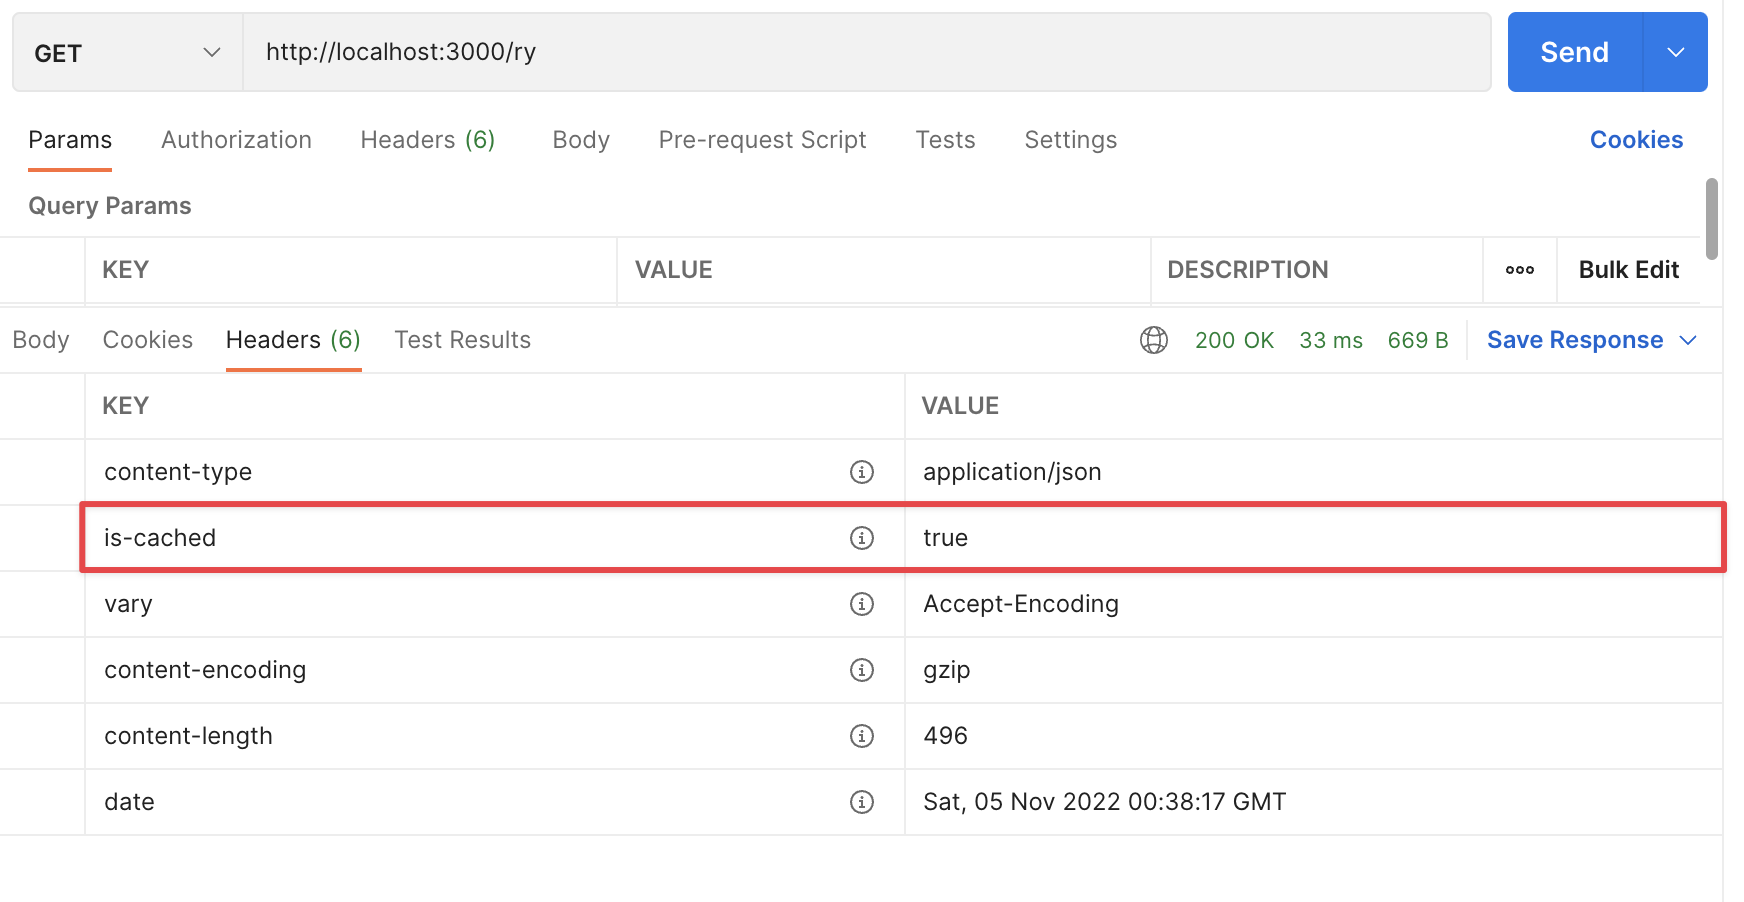
我们还可以看到响应速度快了约 200ms!
您可以在此处查看 Redis 文档 https://redis.io/docs/ 和 Redis node 包 https://github.com/redis/node-redis 。